
If you listen to house, progressive, techno or other club music there’s a good chance you’ve heard this reverse “sucked in” type of effect in tracks before. It can best be described as a reverse sound that starts and nothing and slowly becomes louder in the mix. Listen to this example:
This is what’s known as a reverse reverb. It’s a really handy little technique that you can apply in multiple ways to add interest to your productions. Today I will show you how these types of sounds are made.
We’re using FL Studio as our DAW, but you can easily apply this effect in your own recording program.
To start, choose a sample to apply the effect to. The type of timbre you choose will have a massive effect on the final result. We picked a percussive sample here:
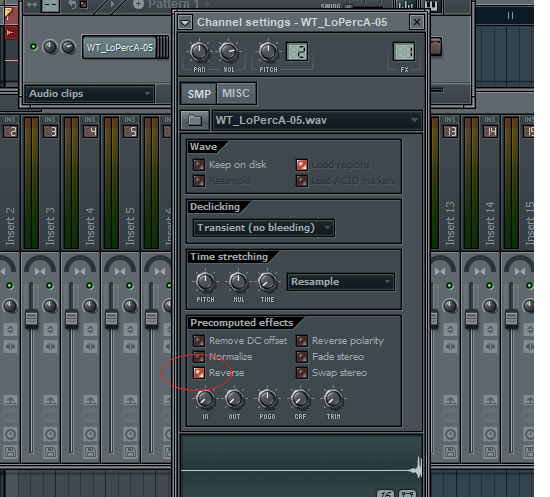
Now we want to apply a reverb to this sound in reverse, so let’s go over to FL Studio’s sample editor and tick Reverse:
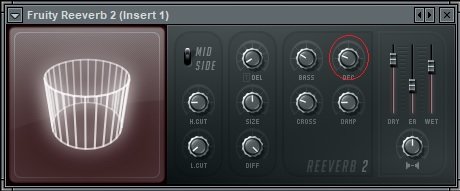
We also want send this sample through an empty channel in our mixer in order to apply a big reverb to it. Drop a reverb VST effect on the channel. We need to set the reverb’s decay time, because that parameter will influence the length of our resulting tail sound. In our example we set the decay to 5 seconds, meaning the final sound will slowly build over a length of 5 seconds before the actual sample is triggered.
You can mess around with other knobs on the reverb and EQ the tail to produce a sound you like. Once you’re happy with it, it’s time to record the sound and the reverb tail. We drop an instance of Edison on the channel and click Record. This plugin starts recording the channel when it detects a sound. Play the sample once and make sure to record the entire tail of the reverb before clicking the record button once again to disarm it.
Here’s our bounced down sample with the reverb on it:
Now all that’s left to do is reverse this recorded sample once again. This will give us the ghost reverb effect that we’re after:
Done! You can cut the tail and play with the timing, or process it even further. Or you could add something like side-chain to make it pump, if that’s what you desire. You can also experiment with other effects than reverb before bouncing it down. Delay works very nicely to get a different type of tail, but feel free to get creative here and use all kinds of VST effects!
No responses yet